nginx怎样修改服务名字进行编译安装?
一、解释源码编译安装nginx软件的预编译,编译以及安装,分别是在做什么,需要注意什么?
1、预编译预编译来确定软件安装的路径,需要打开的模块选项,理由gcc去编译,需要注意nginx的Rewrite模块和http模块会使用到pcre正则表达式语法,因此会使用到pcre库,需要安装pcre编译版本库,pcre-devel提供开发阶段的头文件和编译项目的源代码。zlib库提供压缩算法,因为模块需要使用gzip去压缩。openssl模块提供加密库和加密算法,使用ssl需要安装openssl模块。需要注意的是在预编译的时候需要把以来软件安装,如果系统找不到还需要去指定路径。
2、编译编译为把软件编译为可执行文件,在编译过程中一般会出现路径无效报错。可以检查开关选项和路径,重新执行configure预编译。
3、安装把编译好的二进制文件进行安装,如果编译成功,一般安装不会出现问题。需要注意的是安装路径不能存在相同目录的目录。
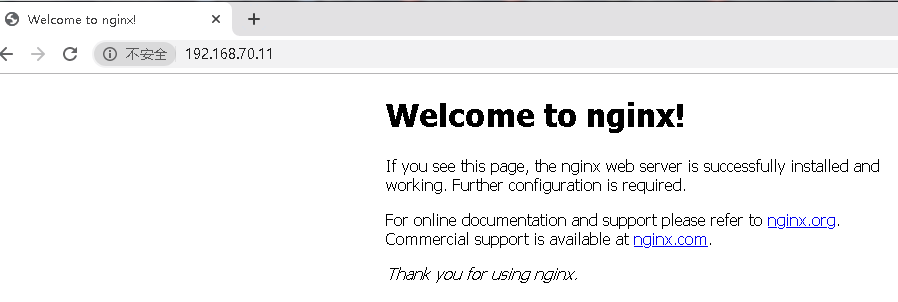
二、、通过源码方式编译安装nginx,并且顺利发布nginx的默认页面,通过浏览器看到的响应头信息中nginx的版本为,server : JFWS
1、下载nginx并解压
[root@nginx ~]# cd /usr/src/
[root@adminnginx src]# wget https://nginx.org/download/nginx-1.16.1.tar.gz
[root@nginx src]# tar xf nginx-1.16.1.tar.gz
2、进入nginx目录并修改文件[root@nginx src]# cd nginx-1.16.1/
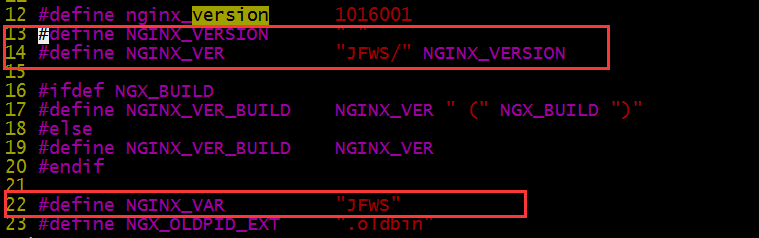
[root@nginx nginx-1.16.1]# vim src/core/nginx.h
 #define NGINX_VER       "nginx/" NGINX_VERSION
//修改为
#define NGINX_VER          "JFWS/" NGINX_VERSION

#define NGINX_VAR          "NGINX"
//修改为
#define NGINX_VAR          "JFWS"
[root@nginx nginx-1.16.1]# vim src/http/ngx_http_header_filter_module.c static u_char ngx_http_server_string[] = "Server: nginx" CRLF;
//修改为
static u_char ngx_http_server_string[] = "Server: JFWS" CRLF;

[root@nginx nginx-1.16.1]# vim src/http/ngx_http_special_response.c
"<hr><center>nginx</center>" CRLF
//修改为
"<hr><center>JFWS</center>" CRLF

[root@nginx nginx-1.16.1]# vim src/http/v2/ngx_http_v2_filter_module.c "http2 output header: \"server: nginx\"");
 //修改为
 "http2 output header: \"server: JFWS\"");

最简单的替换方式使用sed命令替换,方法如下
sed -i "s#\"NGINX\"#\"JFWS\"#" src/core/nginx.h
sed -i "s#\"nginx/\"#\"JFWS/\"#" src/core/nginx.h
sed -i "s#Server: nginx#Server: JFWS#" src/http/ngx_http_header_filter_module.c
sed -i "s#\"<hr><center>nginx<\/center>\"#\"<hr><center>JFWS<\/center>\"#" src/http/ngx_http_special_response.c
sed -i "s#server: nginx#server: JFWS#"
3、安装扩展依赖
[root@nginx nginx-1.16.1]# yum install pcre pcre-devel zlib zlib-devel openssl openssl-devel gcc gcc-c++ -y
4、预编译
[root@nginx nginx-1.16.1]# ./configure [root@nginx nginx-1.16.1]# ./configure --prefix=/usr/local/nginx --user=www --group=www  --with-http_ssl_module
--prefix:指定安装目录
--user:指定web用户为www
--group:指定用户组为www组
--with-http_ssl_module:开启ssl模块
5、编译并安装
[root@nginx nginx-1.16.1]# make && make install
6、启动nginx服务
[root@nginx ~]# vim .bashrc
//添加
alias nginx='/usr/local/nginx/sbin/nginx'
[root@nginx ~]# source .bashrc
[root@nginx ~]# useradd -s /sbin/nologin www
[root@nginx ~]# nginx查看监听端口和进程


7、关闭防火墙和selinux
[root@nginx ~]# systemctl stop firewalld
[root@nginx ~]# systemctl disable firewalld
[root@nginx ~]# sed -i 's#SELINUX=enforcing#SELINUX=disabled#' /etc/selinux/config
[root@nginx ~]# setenforce 0
8、测试并查看是否修改成功
查看是否把nginx修改为了JFWS
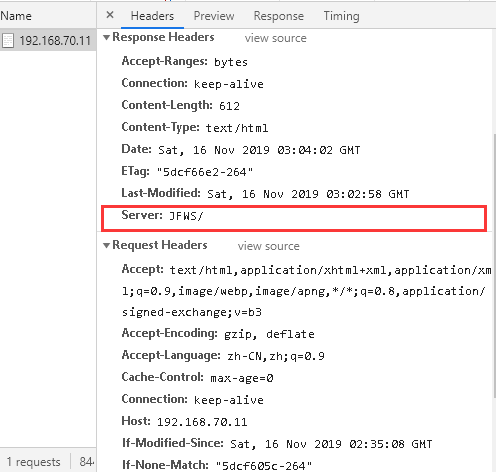
从上图可以看出,成功把nginx修改为JFWS,版本号也没了!
三、、创建三个虚拟主机,域名分别为:www.lutixia1.com;www.lutixia2.com ;www.lutixia3.com;并且访问得到各自的测试页面。
1、修改主配置文件nginx.conf
[root@nginx ~]# cd /usr/local/nginx
[root@nginx nginx]# vim conf/nginx.conf
//添加
include  /usr/local/nginx/conf.d/*.conf;
2、创建虚拟主机配置文件目录并创建虚拟主机配置文件
[root@nginx nginx]# mkdir conf.d
[root@nginx nginx]# cd conf.d/
[root@nginx conf.d]# touch www.lutixia1.com.conf
[root@nginx conf.d]# touch www.lutixia2.com.conf
[root@nginx conf.d]# touch www.lutixia3.com.conf
[root@nginx conf.d]# vim www.lutixia1.com.conf
 server {
           listen       80;
           server_name  www.lutixia1.com;
           location / {
               root   /usr/local/nginx/html/lutixia1;
               index  index.html index.htm;
           }
           error_page   500 502 503 504  /50x.html;
           location = /50x.html {
               root   html;
           }
       }
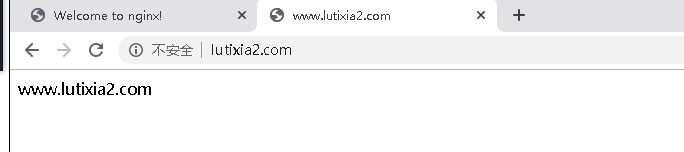
 [root@nginx conf.d]# vim www.lutixia2.com.conf
  server {
           listen       80;
           server_name  www.lutixia2.com;
           location / {
               root   /usr/local/nginx/html/lutixia2;
               index  index.html index.htm;
           }
           error_page   500 502 503 504  /50x.html;
           location = /50x.html {
               root   html;
           }
       }
[root@nginx conf.d]# vim www.lutixia3.com.conf
  server {
           listen       80;
           server_name  www.lutixia3.com;
           location / {
               root   /usr/local/nginx/html/lutixia3;
               index  index.html index.htm;
           }
           error_page   500 502 503 504  /50x.html;
           location = /50x.html {
               root   html;
           }
       }
3、创建web虚拟主机目录、权限修改、创建测试文件
[root@nginx conf.d]# mkdir /usr/local/nginx/html/lutixia1
[root@nginx conf.d]# mkdir /usr/local/nginx/html/lutixia2
[root@nginx conf.d]# mkdir /usr/local/nginx/html/lutixia3
[root@nginx html]# vim lutixia1/index.html
www.lutixia1.com
[root@nginx html]# vim lutixia2/index.html
www.lutixia2.com
[root@nginx html]# vim lutixia3/index.html
www.lutixia3.com
[root@nginx html]# chown www:www -R *
4、测试
[root@nginx html]# nginx -t
nginx: the configuration file /usr/local/nginx/conf/nginx.conf syntax is ok
nginx: configuration file /usr/local/nginx/conf/nginx.conf test is successful
[root@nginx html]# nginx -s  reload

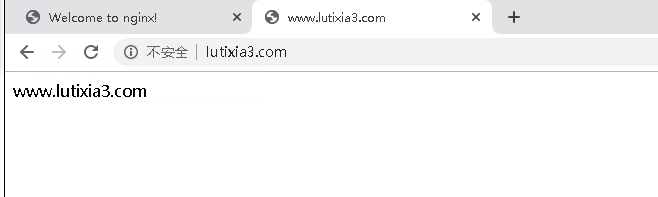
三个虚拟主机创建完成!
声明:本站所有文章,如无特殊说明或标注,均为本站原创发布。任何个人或组织,在未征得本站同意时,禁止复制、盗用、采集、发布本站内容到任何网站、书籍等各类媒体平台。如若本站内容侵犯了原著者的合法权益,可联系我们进行处理。