Rsync+inotify实现简单的实时同步服务
1、rsync优点
rsync具有安全性高、备份迅速、支持增量备份等优点,通过rsync可以解决对实时性要求不高的数据备份需求,例如定期地备份文件服务器数据到远程服务器上,对本地磁盘定期进行数据镜像等。
2、rsync缺点
随着应用系统规模的不断扩大,对数据的安全性和可靠性提出了更高的求,rsync便暴露出了很多不足之处。首先,rsync同步数据时,需要扫描所有文件后进行比对,然后进行差量传输。如果文件数量达到了百万量级及以上时,扫描文件就非常耗费时间,有时还会出现只是很少一部分数据发生了变化,因此rsync就变得非常低效了。其次,rsync不能够实时监测、同步数据,虽然它可以通过Linux守护进程的方式触发同步,但是两次触发动作一定会出现时间差,可能导致服务器端和客户端的数据出现不一致,后期无法在出现故障时完全恢复数据。
3、Rsync+inotify组合
为解决以上问题而出现的,实现了数据的实时同步
4、inotify是什么 ?
inotify是一种强大的、细粒度的、异步的文件系统事件监控机制,Linux内核从2.6.13版本起,加入了对inotify的支持。通过inotify可以监控文件系统中添加、删除、修改、移动等各种事件,利用这个内核接口,inotify-tools便可以监控文件系统下文件的各种变化情况了。
5、查看内核是否支持
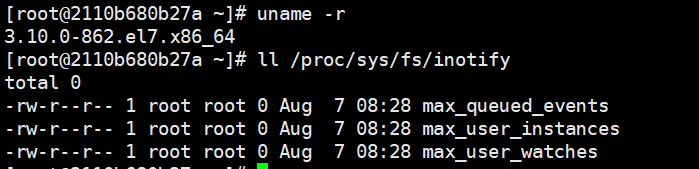
内核在2.6.13以上,如果有以下三个文件系统默认是支持的
6、搭建Rsync+inotify实现同步服务
为了测试方便,这里把防火墙和selinux都关掉
同步服务器IP:172.17.0.2
待同步服务器IP:172.17.0.3
待同步服务器配置
安装rsync服务
[root@2110b680b27a ~]# yum install rsync -y
修改rsync配置文件
[root@2110b680b27a ~]# cat /etc/rsyncd.conf
#ee rsyncd.conf man page for more options.
#configuration example:
 uid = nobody
 gid = nobody
 use chroot = yes
 max connections = 10
 strict mode=yes
 pid file = /var/run/rsyncd.pid
 lock file=/var/run/rsync.lock
 log file=/var/log/rsyncd.log
 [web1]
         path = /web1/wwwroot
         comment = web1 file
         ignore errrors
         read only=no
         write only=no
         hosts allow=*
         hosts deny=172.17.0.10
         list=false
         uid=root
         gid=root
         auth users=test
         secrets file=/etc/web1.pass
创建密码文件
[root@2110b680b27a ~]# vim /etc/web1.pass
test:123456
修改密码文件权限必须为600
[root@2110b680b27a ~]# chmod 600 /etc/web1.pass
启动rsync守护进程
[root@2110b680b27a ~]# rsync --daemon
创建系统自启动文件
[root@2110b680b27a ~]# echo "/usr/local/bin/rsync --daemon" >> /etc/rc.local
查看进程

同步服务器配置
rsync安装
yum install rsync -y
新建密码文件与服务器一致
vim /etc/server.pass
123456
修改权限
chmod 600 /etc/server.pass
启动服务并加入自启动
rsync --daemon
echo "/usr/local/bin/rsync --daemon" >> /etc/rc.local
查看服务进程

inotify软件包下载
https://sourceforge.net/projects/inotify-tools/files/latest/download
安装依赖
yum install gcc gcc-c++ make -y
解压包并安装
tar xf inotify-tools-3.14.tar.gz
cd inotify-tools-3.14
./configure
make && make install
编写shell脚本来配置内容发布点
[root@b2612a228a43 ~]# vim /web/inotifyrsync.sh
#!/bin/bash
 host1=172.17.0.2
 src=/web/wwwroot/
 dst1=web1
 user1=test
 /usr/local/bin/inotifywait -mrq --timefmt '%d/%m/%y %H:%M' --format '%T %w%f%e' -e close_write,delete,create,attrib $src \
 | while read files
 do
         /usr/bin/rsync -vzrtopg --delete --progress --password-file=/etc/server.pass $src $user1@$host1::$dst1 > /dev/null 2>&1
         echo "${files} was rsynced." >> /tmp/rsync.log 2>&1
 done
指定权限放入后台运行
chmod 755 /web/inotifyrsync.sh
mkdir -p /web/wwwroot
/web/inotifyrsync.sh &
echo "/web/inotifyrsync.sh &" >> /etc/rc.local